Understanding The Tech Around Long Term Time-lapse: Let’s Break It Down For You
When you think of photography most people’s thoughts are around the use of a single camera. However professional long-term time-lapse photography requires the use of a number of hi-tech components, including hardware and software, that make up a whole system seamlessly working together to achieve desired outcomes.
Here is an overview of the equipment is required for time-lapse photography.
The Camera & Lens:
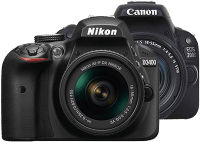
When choosing a camera for long term time-lapse projects we look for reliability not features. These cameras are placed on a project for weeks, months, and even years so we want to make sure they will continue to operate consistently over those time frames. Nikon and Canon DSLR cameras are the workhorses we use and have proven themselves over time. Camera models capturing images up to 24MP and using a simple set of camera settings over hi-end fully-featured models allows us to keep the cost down for our clients and produce images that provide high-quality outcomes.
Every project is different, and the required field of view will be a major factor in determining lens selection. Therefore, having a standard and wide-angle options in our kit provides flexibility to ensure we can adequately frame up our subject. We use a range of Sigma and Tokina lenses, chosen for their reliability and robustness, down to a 10mm focal length for a wide-angle.
Camera settings also play a key role in capturing long term time-lapse. This a subject for a whole new blog.
Time-lapse Controller:
A state-of-the-art PhotoSentenal platform that is connected to the camera and controls the image capture process, uploads photos to the online gallery via 3G/4G connectivity. This communicates the system health and operations to the control hub triggering alerts if there are any issues.

Equipment Housing:
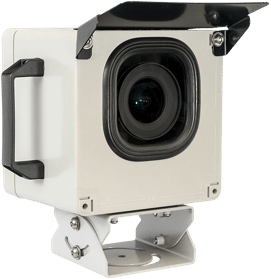
The IP-66 weather-proof housing accommodates the camera, time-lapse controller and a 13600mAh lithium-ion battery, offering protection to the elements. It has been successfully tested in controlled conditions between -15°C and 60°C. The window of the housing consists of optically pure B270Ò glass, highly resistant to solar radiation and engineered to minimise solar flaring.
Power Supply:
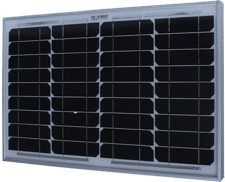
The internal lithium-ion battery is kept charged by a 20W solar panel making the system fully self-sustaining for the life of the project. For indoor or low light applications the system can be connected to 240V AC mains power.
Control Hub & Online Gallery:
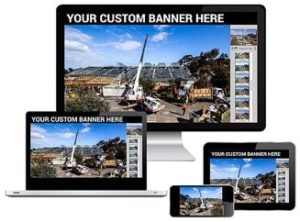
Via a secure login, the online gallery allows our clients to:
- view project photos anytime, anywhere on any device
- download photos for further use or reporting
- Share photos to social media channels.
- overlay and compare photos from different dates and/or times
- access additional features such as periodically auto-generate time-lapse progress videos.
Via the control hub we manage and configure the system remotely to ensure everything is working as it should, which protects our client’s investment. This includes:
- the ability to change the shooting regime – image intervals, start & finish time, what days to shoot
- monitoring real-time data on photos taken, storage space, battery and solar voltage, system messages
- receiving status alerts via email and SMS
Post-Production:
Now that the project is finished, 000’s of photos have been captured and are processed by highly skilled editors and various software suits to produce a dynamic time-lapse video. The process involves 3 main processes:
- Culling – non-productive days (rainy days, no activity etc), and none essential images are culled from the collection. This is to ensure good quality imagery is used and high activity is evident when viewing the video. This will reduce the total no. of images by between 25-40%
- De-flickering, Stabilisation, Colour Grading, and Enhancing – flickering happens where images are taken with different exposures due to various lighting conditions throughout the day (morning, midday, afternoon, overcast, full sunlight). For example, if the photo interval for our time-lapse is 15mins, one photo could be taken in full sunlight and the next under a cloud. One photo is bright and vibrant, the other dark and dull, with every other photo in the sequence somewhere in between. When these frames are joined to make a video, these varying exposures create a flickering or strobe-like effect. Software is used to smooth out the light frequency curve of the image sequence to minimise the flickering effect and make the viewing experience more pleasing to the eye. Stabilisation is generally required when a camera is not set on a solid object, for example, attached to a high pole, where the pole is susceptible to movement from windy conditions. When the pole sways and one photo is taken in a slightly different position to the next this will create a shaking effect when the photos are joined together in the video. This shaking is removed/minimised in the editing process by using stabilisation features in our software. Colour grading and enhancing footage is a normal part of any post-production process for photography and videography, especially when footage is captured in a raw format, to ensure the final product is delivered to a high standard.
- Branding – once the time-lapse video is complete personal branding, to suit a client’s requirements, is added. This may include background music, an into and ending, incorporating company logos, dynamic text at various places, pan/zoom animation etc. etc.
So now you know what equipment is involved, it will help you understand the complexity behind time-lapse photography and may give you a new found appreciation of it.

